Collections
Model your own content — candidates, policies, media — with a listing page, a page per item, and forms that report back to your CRM.
Quick answers
5 questions · click to openWhat is a collection?
A collection is a set of similar records on your website — candidates, policies, media appearances, how-to-vote cards, and so on. You define what you record about each one, then add items from the dashboard. Every collection gives you a listing page and a page per item.
How do I create a collection?
Go to Pages, choose New page, and pick Collection. Give it a title, define the fields you want to record once, then add items. New collections start unpublished, so you can set everything up before anything appears on your site.
What can I use collections for?
Anything you want to list on your site with its own fields: candidates, policies, branches, media clips, FAQs. A feed is better for dated news articles; a collection is better for structured records that are not primarily ordered by date.
Can I bulk import items from a spreadsheet?
Yes. Use Import from a spreadsheet in the ⋯ menu on the collection. You map each column to a field, choose whether to add only or also update what is already there, and see a summary before anything is written. Imported items arrive as drafts.
Do I need a developer to manage a collection?
No for day-to-day work. Adding, editing, importing and unpublishing items is done entirely in the dashboard. You only need a developer if you want item pages to look different from the standard layout, or to embed forms that report back to your CRM.
A collection is a set of similar records you want on your website: your candidates, your policies, your media appearances, your how-to-vote cards. You define what you record about each one, then add them from the dashboard whenever you like.
Every collection gives you two things: a listing page showing all of them, and a page for each item.
Creating a collection
A collection is a page, so you make one the same way you make any other page: go to Pages, choose New page, and pick Collection.
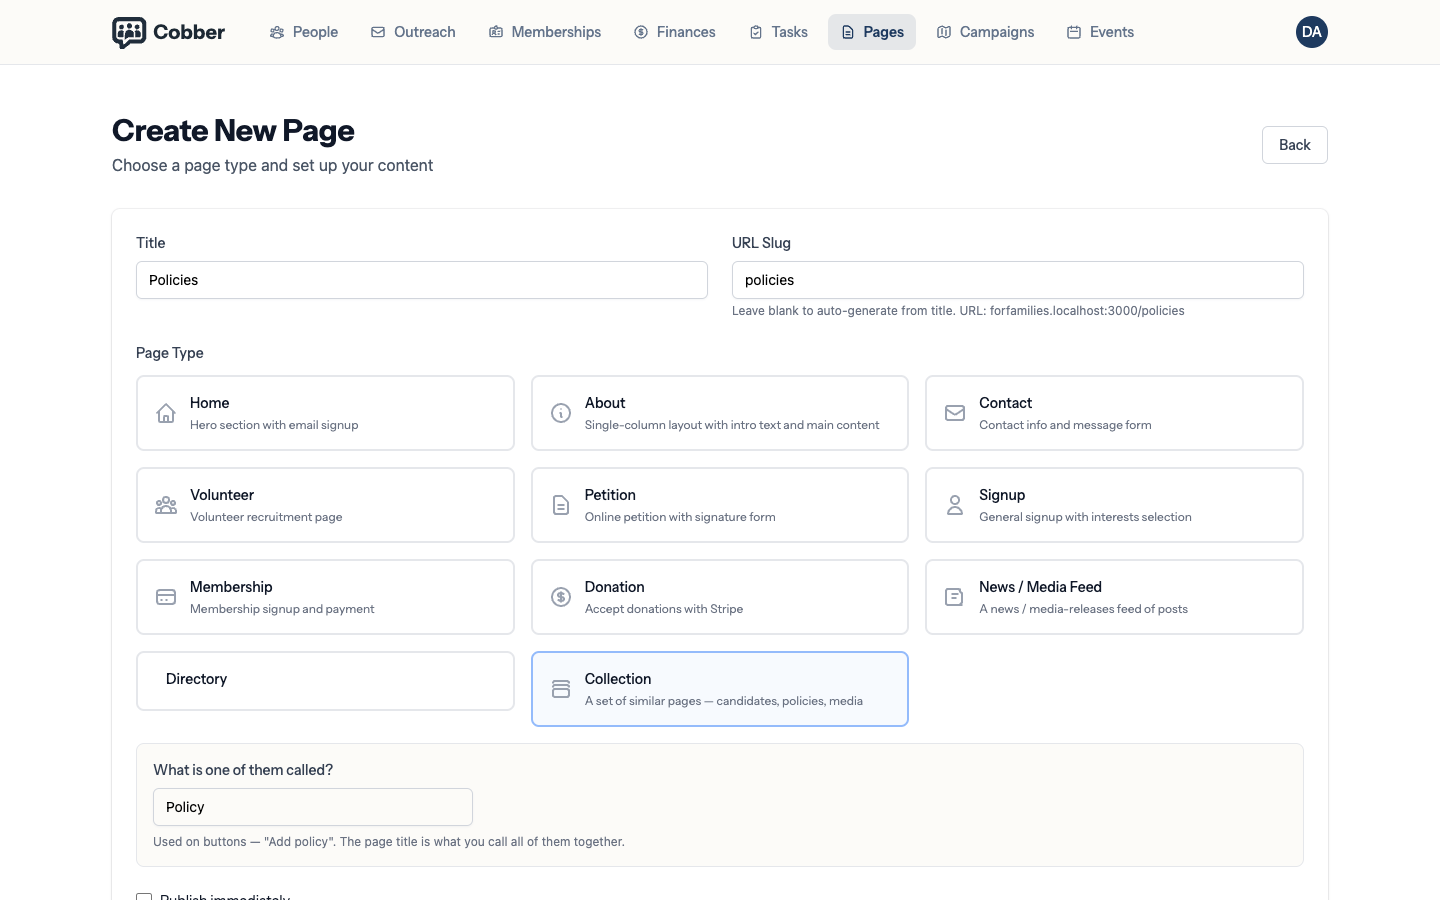
Give it a title — the name for all of them together, like Candidates. That becomes the heading on your listing page, and its web address. You are also asked what one of them is called, because that is what buttons say: “Add candidate”. It is filled in for you from the title and you can correct it, which you will want to do for something like Media.
New pages start unpublished, so nothing appears on your website until you publish it. That gives you time to set the fields up and add the first few entries in private.
Your collection then appears in Pages alongside everything else. Opening it takes you to its own screen rather than the page editor, in the same way a news feed does.
Defining the fields
Fields are what you fill in for each item. On the collection’s Fields tab, add one for each thing you want to record — a photo, a short summary, an electorate, a biography.
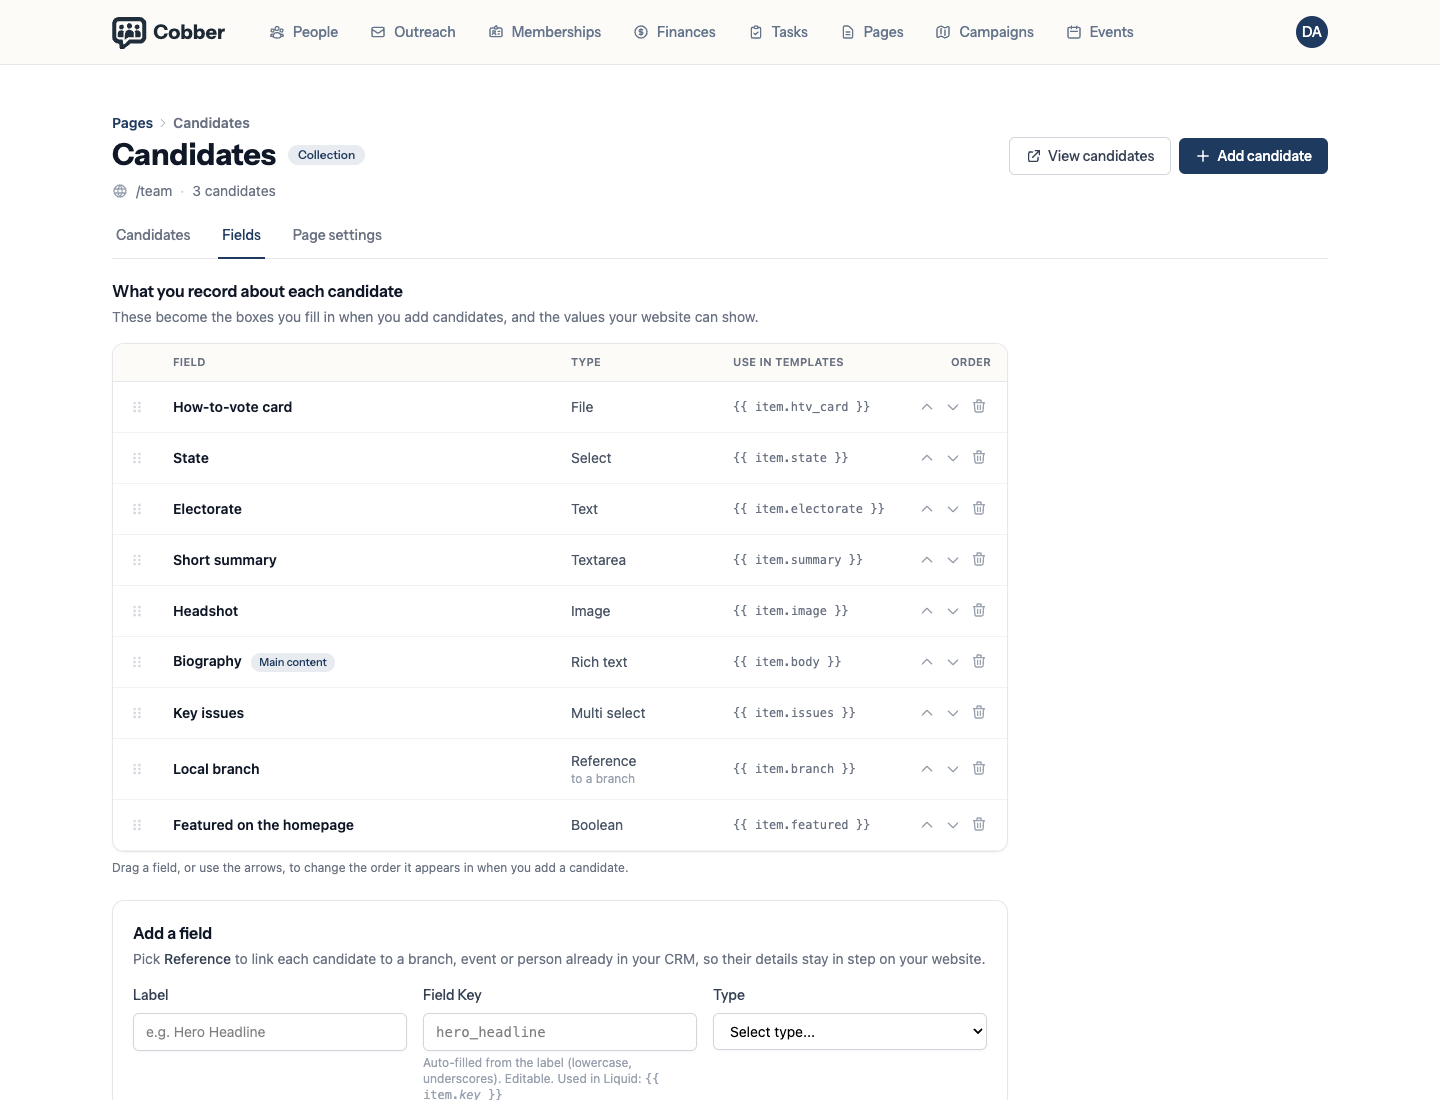
The order matters. Drag a field, or use the arrows beside it, and that is the order the boxes appear in when you add an item. Put the things you fill in every time at the top.
The field types are the same ones you already use elsewhere, plus one that is specific to collections:
| Type | What it holds |
|---|---|
| Text, Long text, Rich text | Words. Rich text has formatting; long text does not. |
| Image, File | A picture, or a document such as a how-to-vote card. You upload these straight onto the item — up to 25 MB each. |
| Number, Date, Email, URL | Exactly what they say. |
| Select, Multi-select | One, or several, from a list of options you set. |
| Yes/No | A tick box — use it for things like “featured”. |
| Reference | A link to a real record in your CRM: a branch, an event, a person, or an item in another collection. |
Reference fields
A reference field is the one worth understanding, because it is what makes a collection part of your CRM rather than a separate website.
Give your Candidate collection a reference field pointing at a branch, and each candidate is linked to a real branch record. Their page can then show that branch’s name and its next two meetings — and it stays right on its own, because you are pointing at the branch, not copying it. When the branch schedules a new meeting, the candidate’s page shows it.
How the form is laid out
Collections come in two shapes, and Cobber picks the one that fits your fields:
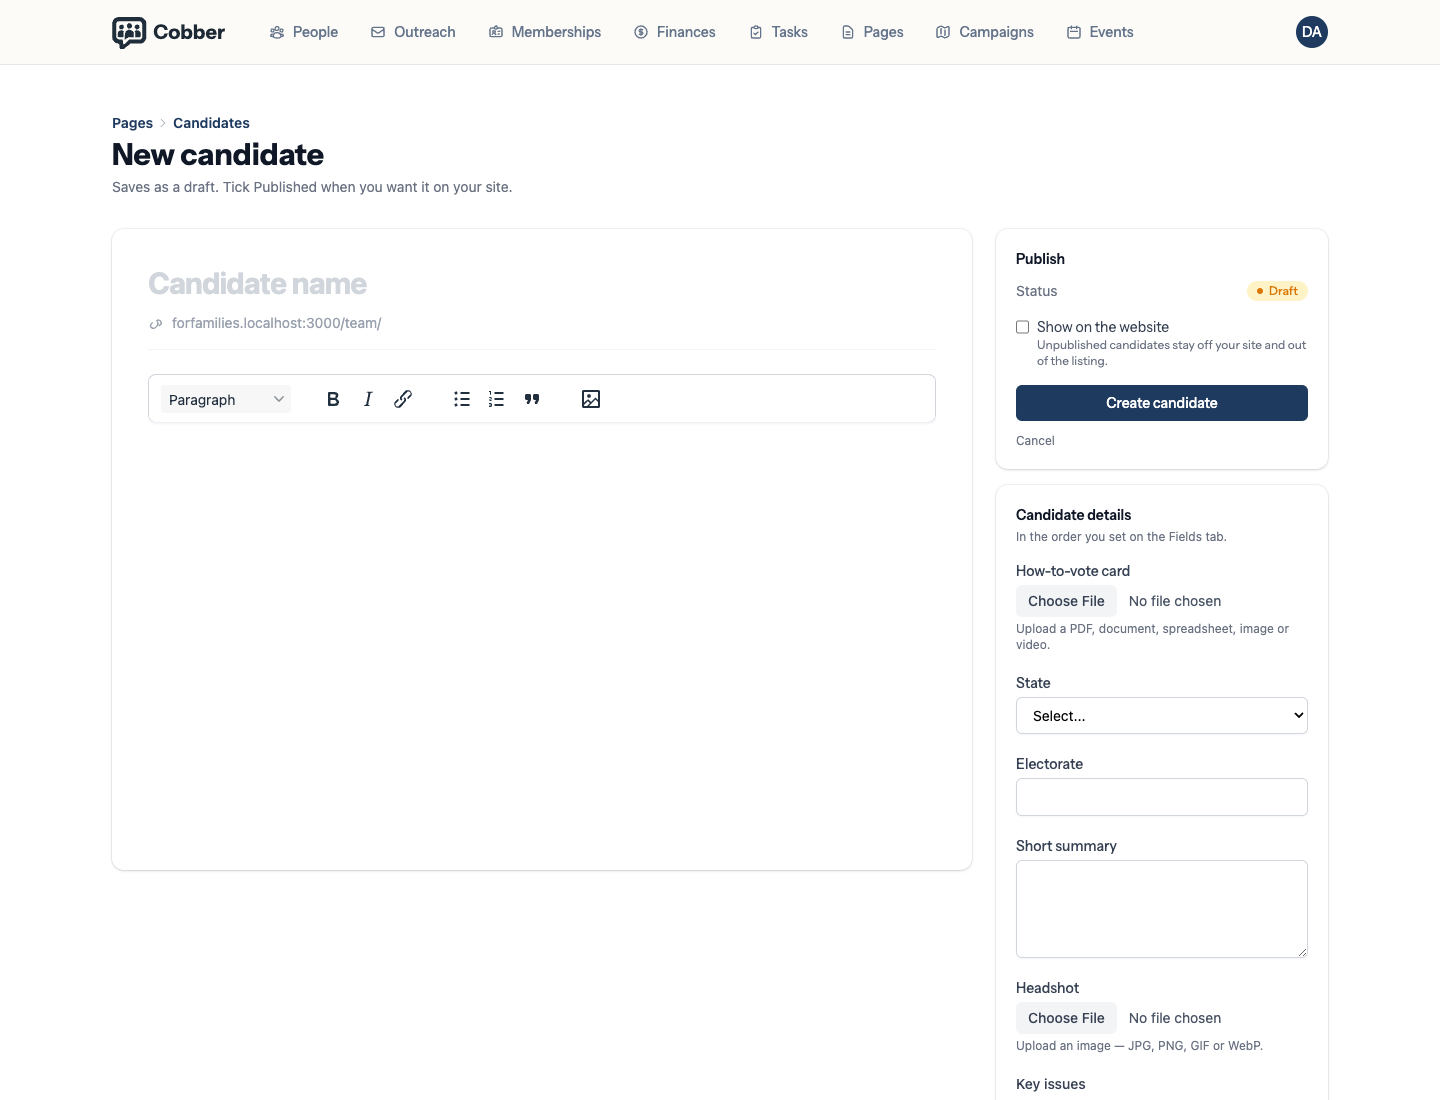
- Writing — one field fills the page with a proper text editor, and everything else sits in a sidebar beside it. This is what you want for candidates, policies, or anything with a biography. It works the same way as writing a post.
- Details — every field in one compact form. Better for short entries like media appearances, how-to-vote cards or FAQs, where a big writing area would just be empty space.
You get Writing as soon as the collection has a rich text field, and Details when it does not. Change it on the Fields tab under Form layout if that guess is wrong.
Where a collection has more than one long field, the one marked Main content is the one that fills the page. Rich text always wins over plain long text, so a Short summary will not push a Biography out of the way — and where two are equal, the one higher up the fields list wins.
Adding items
From the collection’s screen, choose Add and fill in the fields. Items save as drafts until you tick Published, and an unpublished item is not on your site and does not appear in the listing.
The list shows the first couple of your own fields as columns, so you can see at a glance which electorate or category each one belongs to. Use the tabs above it to see only published items or only drafts, and the search box to find one by name.
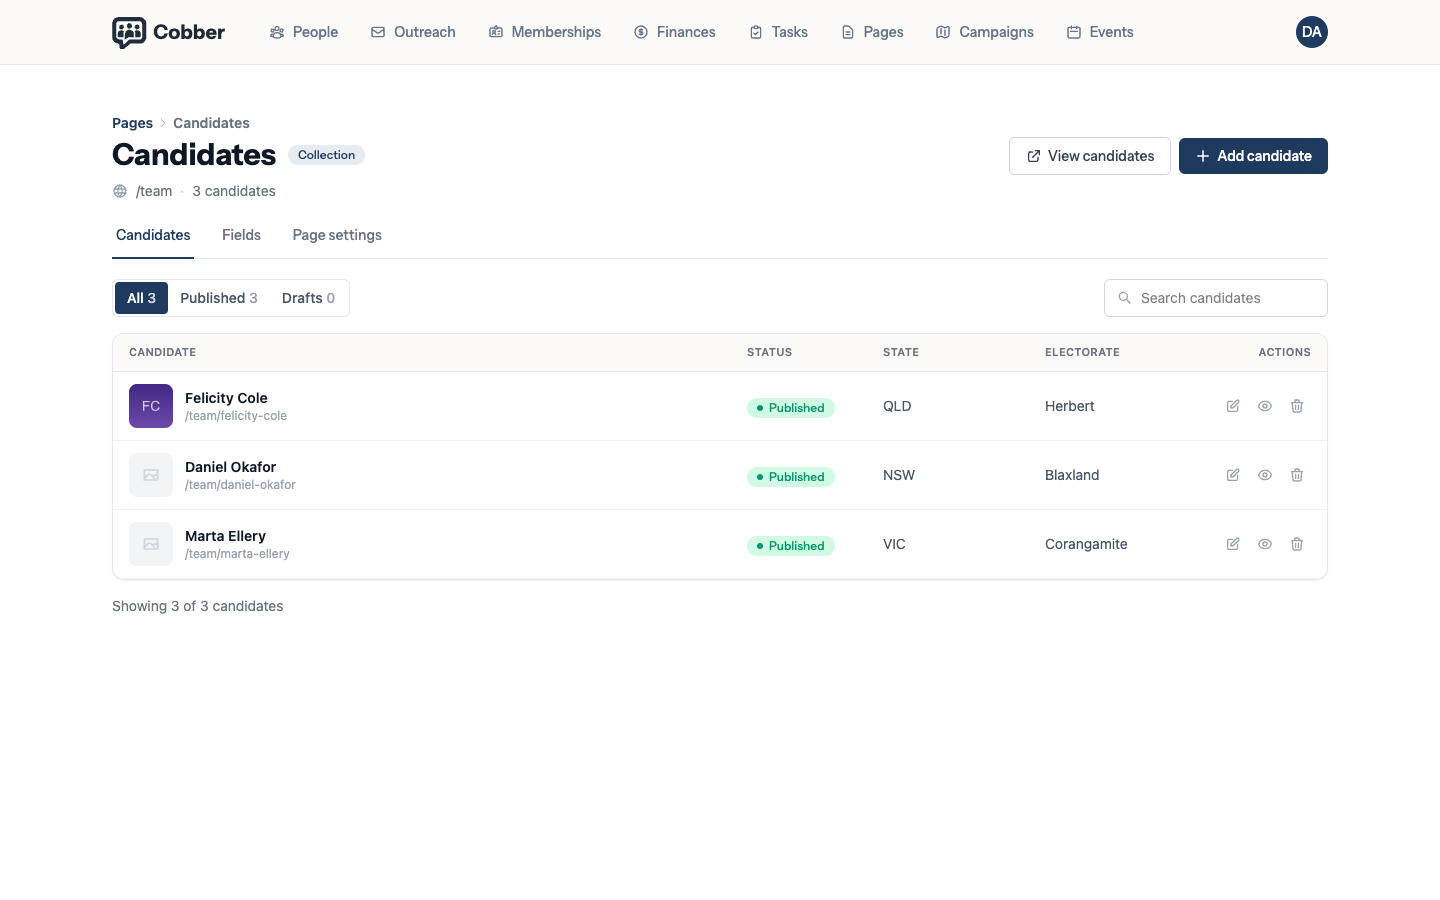
To take one down, untick Published — you do not have to delete it.
Importing from a spreadsheet
For anything more than a handful, use Import from a spreadsheet in the ⋯ menu beside Add, rather than typing them in one at a time.
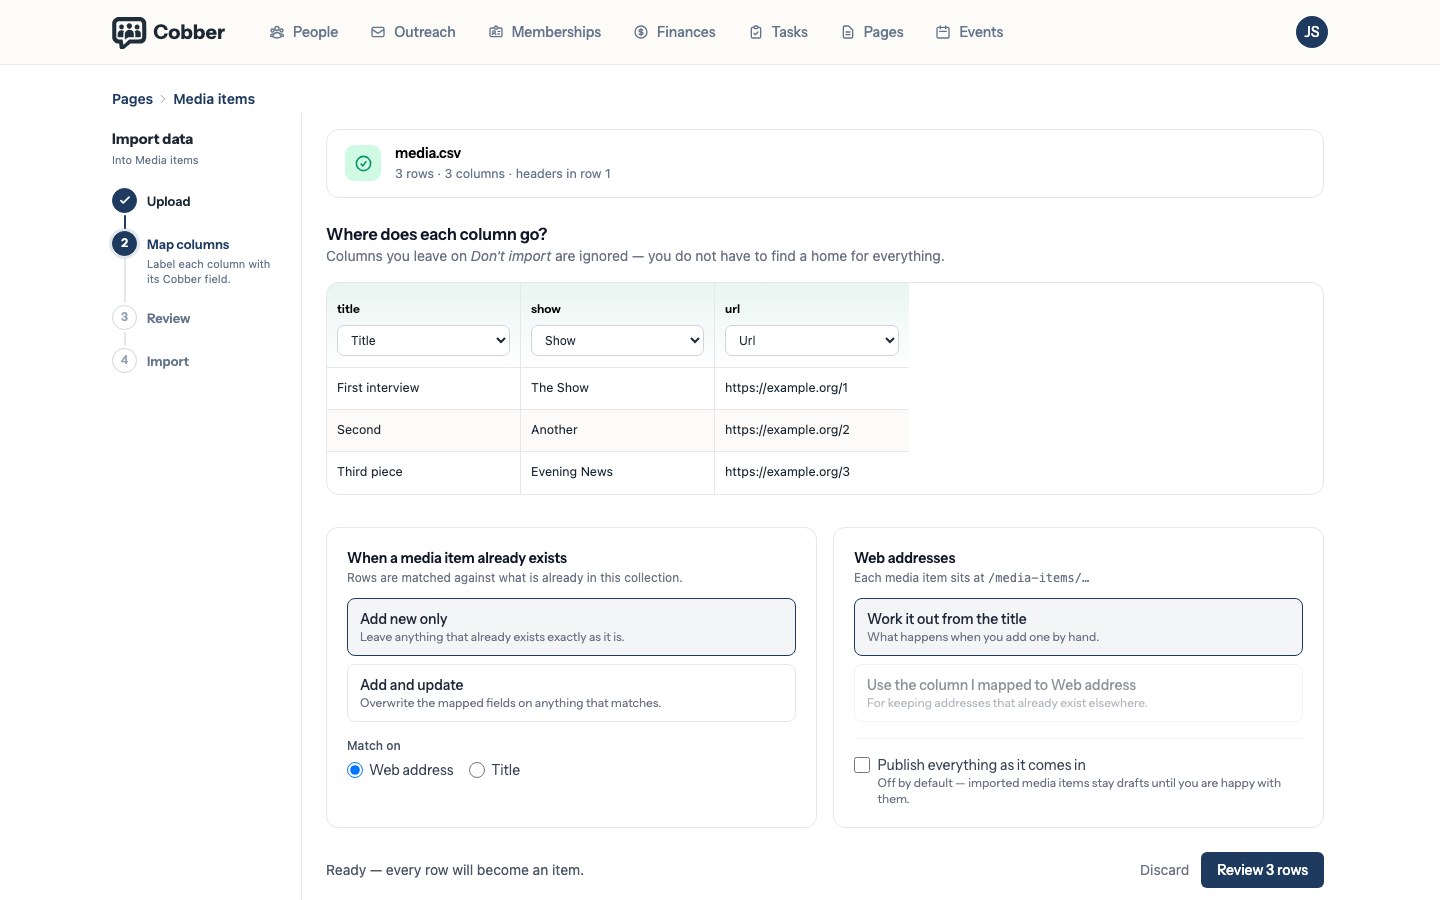
You upload a CSV or spreadsheet with one item per row, then say where each column goes. Column names do not have to match anything — you choose. Anything you leave on Don’t import is ignored, so a file with extra columns is fine. A column with no matching field can become a new one on the spot, added as a text field.
Two things to decide before it runs:
When an item already exists. Add new only leaves anything already there untouched; Add and update overwrites the fields you mapped. Items are matched on their web address by default, or on their title if you prefer. Web address is usually safer — two items can share a title, but never an address.
Where the web address comes from. Normally it is worked out from the title, exactly as it is when you add one by hand. If your file already has addresses — say you are moving posts from another system and want to keep their links working — map that column and choose to use it.
Nothing is written until you have seen the summary: how many will be added, updated, skipped or cannot be imported, and which rows have a problem. Imported items arrive as drafts unless you tick the box to publish them, so you can look before anything appears on your site.
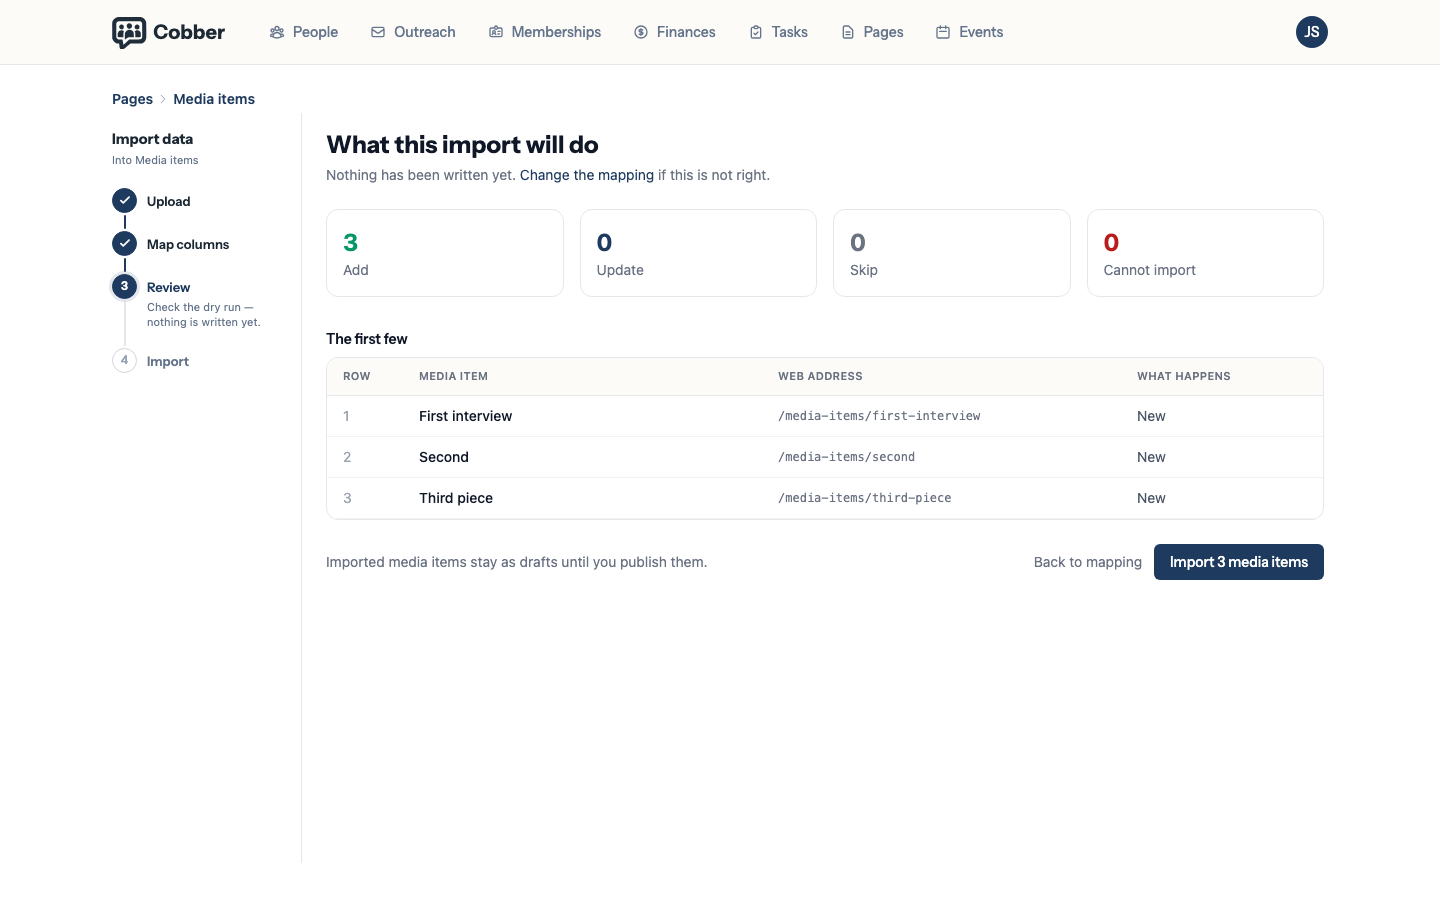
A blank cell never wipes a value that is already there — a gap in the file means “no data”, not “delete this”. And if your file has values a Select field does not offer yet, they are added to the field so the imported items show the right thing; the summary names them first.
Forms on item pages, and who filled them in
This is the part that makes collections worth using instead of a page builder.
An item’s page can carry your real Cobber forms — a contact form, a donate button, a volunteer sign-up — and every submission is recorded against that item. An enquiry through Felicity’s page is not just an enquiry: it is an enquiry to Felicity.
That means:
- On People, you can filter by the collection item and see everyone who came through it. Save that as a list, and email or text them like any other segment.
- Donations made through an item’s page are attributed to it, so you can report on what a particular candidate or policy raised.
Adding a form to an item template is a theme change, so it is the one part of this that needs a developer — see theme development.
Changing how they look
New collections start with a plain, tidy layout that follows your theme’s colours and fonts, so they look like the rest of your site straight away.
If you want a collection to look different — candidate profiles laid out differently from policy pages — a developer can add a layout just for it, and the ones without a custom layout carry on using the standard one. See theme development.
Renaming or removing one
The collection’s own settings — its title, web address and whether it is published — live on the Page settings tab, because a collection is a page. What each item is called sits on the Fields tab, under Naming.
Deleting the page deletes the collection with it: its items, its fields and its listing. Anyone following an old link will get a not-found page, so redirect or remove those links first. It cannot be undone.